Install & Configure NativeVideo
Pre-Installation Steps
Validate all the followings:
- Salesforce Digital Experiences have been enabled. From the “Digital Experience > Settings” section in the Setup panel, tick the “Enable Digital Experiences” option, and follow through the Salesforce configuration steps.
- Check that the email deliverability is set to all. In the Salesforce Setup panel, navigate to the “Deliverability” page and make sure that the “Access Level” pick-list is set to “All email”
- Salesforce Lightning has been enabled in the Org, with a custom domain deployed to all users
- Chatter has been enabled in the Org: in the Setup panel, navigate to the “Chatter Settings” page and verify that the “Enable” checkbox has been ticked.
- In the section "Sharing Settings" of the "Admin Panel", double check if the option "Secure guest user record access" has been checked
Installation Steps
Install the NativeVideo package from the AppExchange:
https://appexchange.salesforce.com/appxListingDetail?listingId=a0N3A00000EcrkaUAB
Click on "Get it Now" and login with the Salesforce credentials of the Org where you wish to install NativeVideo. Select "All Users" or "Admin Only", depending to which users you want to grant access to by default.
Post-Installation Steps
Once the package has been installed, please follow these manual steps:
- From the nine dots on the top left of your homepage in Salesforce, search for the "nativevideo Admin" app
- On the "Media Platform" tab, select the nativevideo media backend region you wish to connect your Org to and hit the "Save" button and wait for the confirmation popup

- Select the second tab "Buffy Connector" and click on the "Click here to (re)connect your user" link
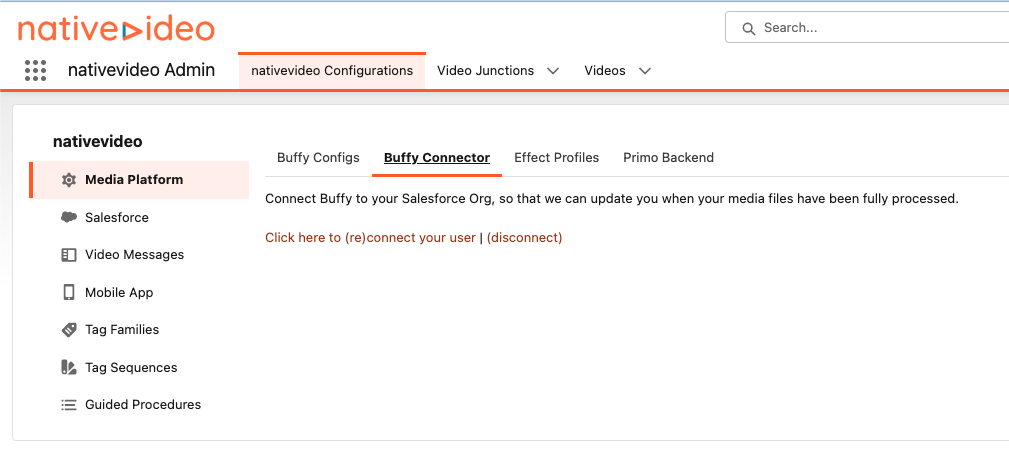
- On the popup that has just appear, please do login with the same Salesforce credentials of the Org where you have just installed nativevideo and grant access to our media backend. Once connected, a success message will appear on a green background, and the popup will close itself
Optional Steps
Follow these steps in order to enable public landing pages with video contents:
- In the setup panel, look for the “Sites” page and click on the “New” button. In the new site form page, specify the following values:
- Site Label: "NativeVideo Public Site"
- Site Name: "NativeVideo_Public_Site"
- Site Description: "Public site to access NativeVideo contents: Web-hooks to get updates on the video, e.g. audio, transcriptions, streams readiness. Thumbnails"
- Default Web Address: "nativevideo"
- Active: True
- Active Site Homepage: "VideoWebHook"
- Please note the base home URL of the Site. Navigate to the details page of the newly created site and click on the “View” link on the “Custom URLs” section. The link has to be in the HTTPs protocol and without the slash at the end, like for instance “https://myorg-site.eu9.force.com/nativevideo”
- From the details page of the newly created site, click on the "Public Site Settings" button and then on the "Assigned Users" button to see the list of users. Click on the "Site Guest User, NativeVideo Public Site" user and:
- Update the email address of the guest user
- Add the following permission set:
- "NativeVideo Public Site User Permissions"
- Navigate to the homepage of your Org (not the Setup Home, but the generic "Home" tab) and note the URL. If for instance the full URL is “https://myorg.lightning.force.com/lightning/page/home”, note aside “https://myorg.lightning.force.com”, making sure it’s in HTTPs and without the slash at the end
- Navigate to the "nativevideo Admin" app and select the "Salesforce" tab. Add the following configurations:
- "Public Site URL" with the URL noted at point 2
- "Base URL" with the URL noted at point 4
- If you wish to shorten public URLs via Bitly, navigate to the "nativevideo Admin" app and select the "Video Messages" tab. Add the following configurations:
“Shortener Token” field with the Generic Access Token from Bit.ly (how to get it here) - if not available, specify this generic value “ac0b96a3c8992ad7823d9175b56eb60e25db3b37”
Optionally the “Shortener Group Id”, with the ID of the Bit.ly Group associated to the family of shorten URLs
Optionally the “Shortener Domain”, with the custom Bit.ly Domain
Open the Developer Console and from the menu "Debug" click on the first option "Open Execute Anonymous Window". Copy and paste the following code and execute it with a system user that will always be available:
System.schedule('NativeVideo VideoBatchJob', '0 30 * ? * * *', new nativevideo.VideoBatchJob());
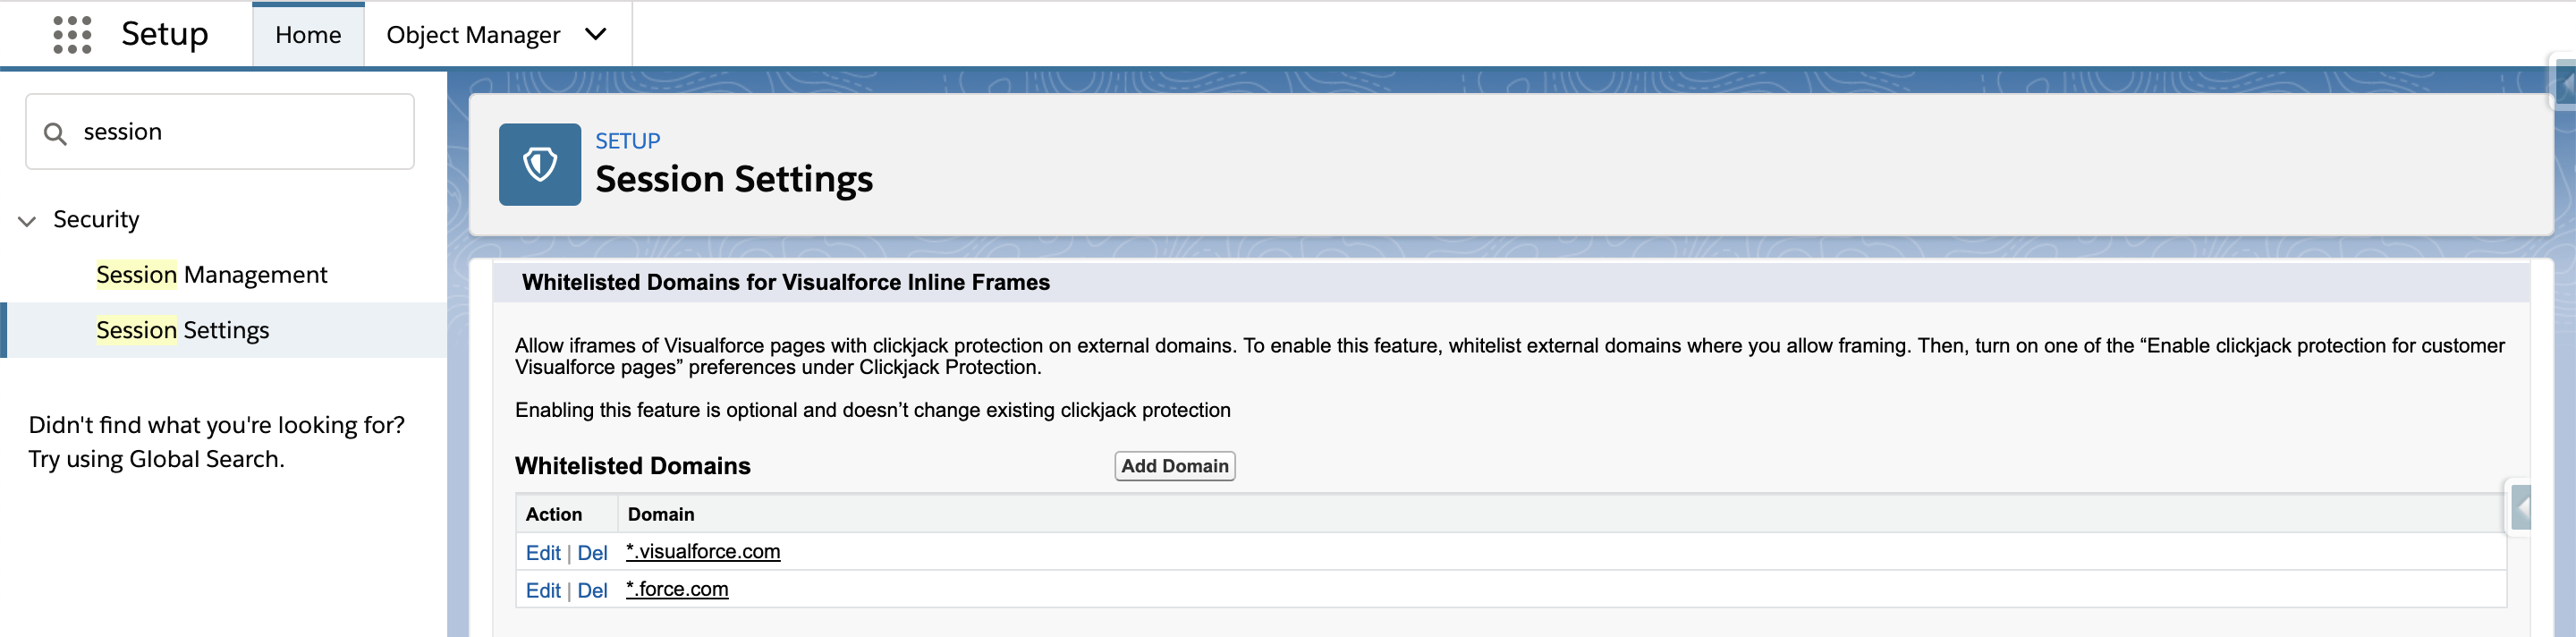
Common Issues
- If inside Lightning the NativeVideo components are just returning blank pages, add *.force.com in the whitelisted origins: