Enable the uploading of existing video files
Perhaps you already have a video and you just want to upload it with NativeVideo, so that only the right people can access it anytime, you can add your company logo as watermark... and in the future also closely look up and analyse your view statistics?
Video uploading is possible out of the box, and how to activate this feature depends only on how you have decided to embed your recording functionality.
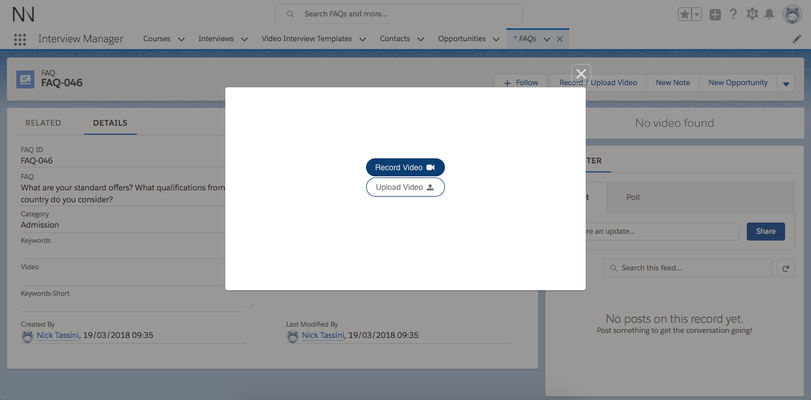
Once enabled, the VideoRecord component will default the initial screen to something like the following, where the user is asked to decide if he or she wants to upload an existing video or record a new one:
So, let's now take a look on how to enable the video uploading on your VideoRecord component.
Video uploading with out of the box VideoRecord component
If you have just dragged and dropped the VideoRecord component in one of your pages, enabling the upload of existing videos is just one click away. Go back into the Lightning App / Community Builder, edit the page where your recording functionality is and tick the "Allow Video Upload" checkbox. Save the page and now you can start uploading your videos.
Video uploading with a VideoRecord component wrapper
If you have instead wrapped the VideoRecord default component with a Lightning Action or, more broadly speaking, with your own Lightning Component, you can achieve exactly the same video uploading capabilities just add the same configuration but via a new line of code. In the controller of your component, just add what is shown in line 12 of the code snippet below:
doInit : function(component, event, helper) {
    var runningId = component.get('v.recordId');
	$A.createComponent(
		"nativevideo:VideoRecord",
		{
			"aura:id": "recordingFAQ",
            "updateObjectName" : "UQ_FAQ__c",
            "updateField" : "Video__c",
            "updateRecordID" : runningId,
            "videoApprovedOrigin" : "https://" + window.location.host,
            "successMessage" : "",
            "allowVideoUpload" : "true",
			"mainColour" : "003E74"
        },
		function(newComponent, status, errorMessage) {
			if (status === "SUCCESS") {
				component.find("recordingFAQCnt").set("v.body", newComponent);
			} else if (status === "INCOMPLETE") {
				console.log("No response from server or client is offline.");
			} else if (status === "ERROR") {
				console.log("Error: " + errorMessage);
			}
		}
	);
}
Save the component and reload the page, your configuration now supports video uploading.
Supported Formats
Supported file formats for uploading video files are: mp4, mpg, avi, mov, mkv, wmv, ogv, webm, flv
Conclusion & Next Steps
We have now seen how easy it is to enable video uploading in NativeVideo, allowing you to keep control on who can see the video in exactly the same way as described for the video recording.
In the next chapter of this advanced section we will be looking at the end to end process that each video goes through and how to inject custom behavior at each stage. If this sounds interesting, jump here.
